Preparing and handling data is a core step of any machine learning pipeline. Today, we will look at handling data when the data is an image (or image-like) in PyTorch.
PyTorch and Torchvision
PyTorch provides us with the amazing torchvision package for dealing with common image transformations such as normalizing, scaling, random flipping and converting arrays to PyTorch tensors. It also provides us with common computer vision datasets such as MNIST, Fashion MNIST and CIFAR-10. In this post, we will focus on preparing the Fashion MNIST dataset.
To begin, we start by importing torch and torchvision.
import torch
from torchvision import datasets, transforms
Note that we will refer to the submodule
datasetsandtransformsdirectly from now on (i.e. we will not emphasize that it’s part oftorchvision).
👜 Fashion MNIST dataset and composing transformations
The Fashion MNIST dataset by Zalando Research is a famous benchmark dataset in computer vision, perhaps second only to MNIST. It is a dataset containing 60,000 training examples and 10,000 test examples where each example is a 28 x 28 grayscale image. Since the images are in grayscale, they only have a single channel. If the image is in RGB format instead (e.g. if we are dealing with CIFAR-10), then it has 3 channels one for each red, green and blue.
As mentioned before, the Fashion MNIST dataset is already part of PyTorch. However, this does not mean that the dataset is already in perfect shape to pass into a PyTorch neural net. We would need to apply some (image) transformations to the dataset upon fetching. For brevity, we will apply only two simple transformations:
- Converting the images to a PyTorch
tensor– by usingtransforms.ToTensor(). - Normalize the channel of the resulting tensor – by using
transforms.Normalize().
Why do we do these transformations?
- Since we will be working with neural nets in PyTorch, it is only natural that we want the image to be a PyTorch tensor. This enables the PyTorch API to interact properly with our dataset.
- Normalization is important to ensure that our neural nets learn better. For an idea of how normalization works, check out this discussion.
We can then compose these transformations using transforms.Compose() as below.
transform = transforms.Compose([
    transforms.ToTensor(),
    transforms.Normalize(mean=(0.5), std=(0.5)),
])
Note that the mean and standard deviation value of 0.5 should be calculated from the training set in advance. Here, we just assume that mean = std = 0.5 for simplicity.
💾 From dataset to DataLoader
The next step is to finally fetch the dataset, passing our transform above as an argument. The FashionMNIST dataset can be accessed via datasets.FashionMNIST, no surprise there. We can then fetch the 60,000 training examples using the following code:
trainset = datasets.FashionMNIST(root='./data',
                                 download=True,
                                 train=True,
                                 transform=transform)
Let us break down what each argument means.
rootspecifies the location of the dataset. Here, we specify that it should be in the directory'./data'.downloadis a boolean flag which determines if we want to download the dataset if the data is not already inroot.trainis another boolean flag which determines if we want the training set. Getting the test set is as simple as passingtrain=False.transformis the transformations we would like to apply to the dataset upon fetching.
Once we have our transformed train set, we can now start training neural nets on this data using PyTorch. However, let us take a second to think about the following:
- What if we want to work with minibatches of this dataset instead of single examples? This is definitely a need when the dataset is too large like ours to be trained entirely.
- We would also want to reshuffle this dataset on each epoch so that our neural net generalizes better.
- If the data is big, we might even want to load the data in parallel using
multiprocessingworkers to retrieve our data faster.
This is where PyTorch’s so-called DataLoader comes in. It is an iterable that provides all the above features out of the box on top of providing a smooth API for working with data!
To use the DataLoader object on our train set, we simply access torch.utils.data.DataLoader and feed trainset into it.
trainloader = torch.utils.data.DataLoader(trainset, batch_size=64,
                                          shuffle=True, num_workers=0)
Here, we have decided to use a batch_size of 64 images, which are sampled randomly on each epoch due to shuffle=True. We also put num_workers=0 meaning we are not loading the data in parallel.
We can fetch the Fashion MNIST test dataset in a similar fashion. The only difference is that we now have train=False.
testset = datasets.FashionMNIST(root='./data',
                                download=True,
                                train=False,
                                transform=transform)
testloader = torch.utils.data.DataLoader(testset, batch_size=64,
                                         shuffle=True, num_workers=0)
🕵️ Inspecting the dataset in DataLoader form
Once we have the dataset in DataLoader form, we can start inspecting our dataset. For example, we can get the shapes of our trainset.
print("Train shape:", trainloader.dataset.data.shape)
print("Test shape:", testloader.dataset.data.shape)
Train shape: torch.Size([60000, 28, 28])
Test shape: torch.Size([10000, 28, 28])We can also get the minibatch size as specified when initializing the DataLoader.
print("Train batch size:", trainloader.batch_size)
print("Test batch size:", testloader.batch_size)
Train batch size: 64
Test batch size: 64For a more advanced inspection, we can even look at the sampler and the collate function used in the DataLoader. The sampler determines how the data is shuffled and the collate function specifies how the data is batched.
print("Sampler:", trainloader.sampler)
print("Collate function:", trainloader.collate_fn)
Sampler: <torch.utils.data.sampler.RandomSampler object at 0x7fcc02b23b90>
Collate function: <function default_collate at 0x7fcc05c9a710>Since we did not pass anything during initialization, we get the default RandomSampler object for the sampler and the default default_collate collate function as expected.
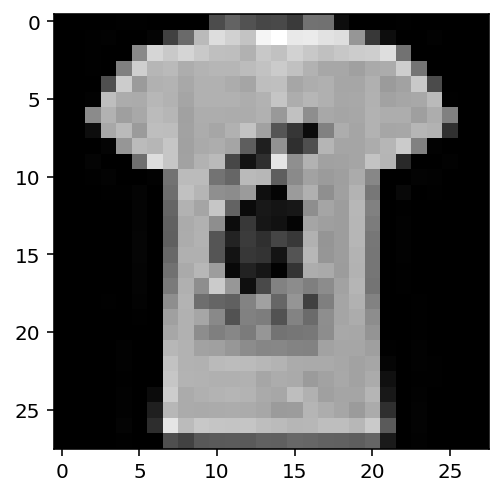
As we are dealing with an image dataset, it is a shame if we are not plotting anything during inspection. Let’s plot the first image from the first batch in trainloader.
images, labels = next(iter(trainloader))  # Gets a batch of 64 images in the training set
first_image = images[0]  # Get the first image out of the 64 images.

import matplotlib.pyplot as plt
plt.imshow(first_image.numpy().squeeze(), cmap='Greys_r')
plt.show()
Here, we get a t-shirt which is expected since we are dealing with a fashion dataset after all. If you run the exact code, you might get a different output since the dataset is shuffled and I did not specify a seed.
For the simplified version of this post in jupyter notebook format: notebook version.